A guide to designing your own wall railings.
Designing your own wall railings, having your own design, is far pleasing. That just having an off the shelf design and its not as difficult as you think. Our guide is here to help you understand the process and make it easy to come up with your own design of choice. The greatest thing is, not as expensive as you think to add a personal touch. We have a whole system based on removing a plain bar for a simple railing design and adding a decorative bar.
Each railing has a price for the “base” model, each decorative bar has a price. So working out a price is easy, allowing you to stay within a budget.
Navigation
All important height.
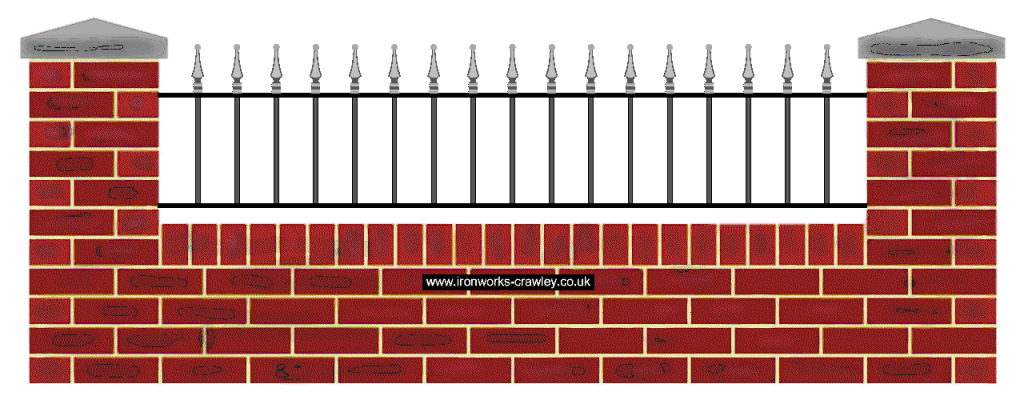
The height of your railing has a major effect on what you can put in a railing. The taller it is the longer the upright bars. The longer these are the more detail you can add in. Which perhaps seems quite obvious. But there are a few factors at work here, of which i will explain. Assuming you have a wall and brick piers, the height of the piers is 600mm above the wall. First you need some clearance off the wall. Ideally a railing shouldn’t sit on the wall, but above it. 40mm is a good amount for clearance.
So our 600mm railing has just become a 560mm tall railing , now depending on what your choice is for top decoration. But assuming it is a railing head. this could easy take another 130mm – 160mm off, depending style of rail head. So our upright bars are now around 400mm long. This what we have to work with to get our design in.
Base parts.
The whole design system is based on 5 parts, but these parts can be used in combination to create a decorative bar. But this of course depends on you bar length.
The Basket.
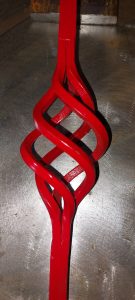
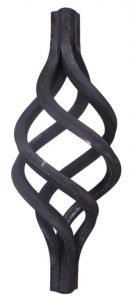
The basket or cage is a pre manufacture mass produce part. This is then welded into a piece of square bar. Baskets vary in height according to the size of bar they were design for. The 12mm version being around 130mm tall and the 16mm at 160mm.
So in order to get a basket in a bar, it ideally have around 50mm or more of plain bar each end. 250mm long would be an ideal minimum length for a bar.
But we could get 2 cages in a bar of 400mm long when using 12mm square.
Note: a basket does not need to be welded in the centre of a bar. It can be offset to top or bottom, allowing them to be used in series to create a wave pattern.
Price for these is £4 per basket for 12mm
The twist
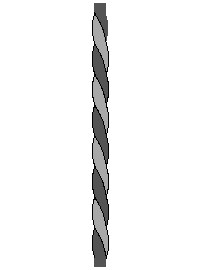
The twist is just a piece of square bar that has been, twisted.
Before we get into how to combine the parts into something useful. Lets look at the top decoration that can be used. Its Suprisingly the same as a gate