Decorative wrought iron scrolls
Pages connected to this page
Wrought iron Scrolls are a great medium to use as a decorative infill for almost any wrought iron design. That are adaptable to suit many situations. We use 5mm thick for scrolls rather than the usual 3mm thick used by many others. 3mm is easy to bend cold, when compared to 5mm. Its a strength if you are trying to mass produce metal work. but its also its weakness as it bends very easy.
But of course it depends on what you are doing with the scrolls. everything is flexible to an extent, so if you don’t mind thinner scrolls and want to push the price down a little. Ask about having the scrolls made from 3mm flat to reduce price.
Scrolls from 5mm thick steel are much harder form cold but its also more durable. The width of the material used will depend on the size of the upright bars, if using 12mm uprights then its 12mm x 5mm for the scrolls. If its 16mm uprights then its 16mm x 5mm for the scrolls. Its all about looks and durability, despite 5mm thick scrolls being harder and slower to make. For me, worth the extra effort with out a doubt.
But everything is flexible to an extent, so if you don’t mind thinner scrolls and want to push the price down a little. Ask about having the scrolls made from 3mm flat to reduce price.
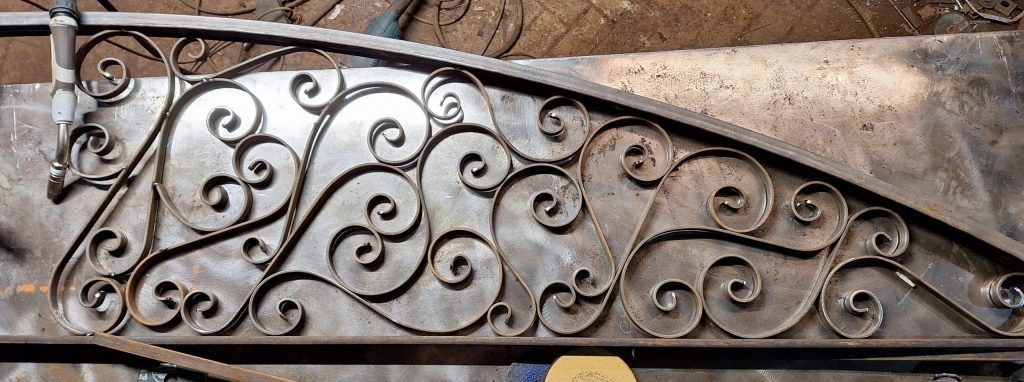
Random scroll pattern in the arch of a railing using 20mm x 5mm scrolls. It was literally a case of making a batch off assorted scrolls and placing them in the arch. Arranging so that half the arch was filled. Then replicating what was made to fill the other half of the arch. creating a mirror image. Time consuming but very effective.
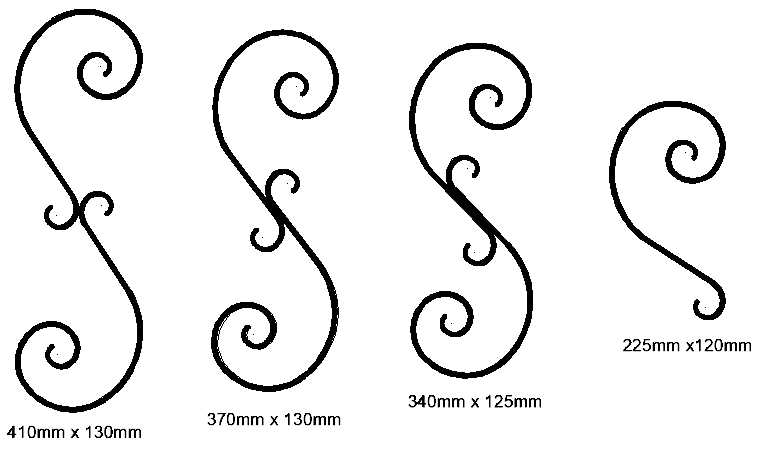
S scrolls
An S scroll is where one end is rolled one way and the other in the opposite direction, forming a kind of letter S. It is common for one end to be more scrolled than the other. The larger end is often referred to as the head. The smaller is referred to as the tail. This style of scroll is very common in the majority of gate designs. Although you can have a two headed S scroll where both ends are rolled to the same size.
C scrolls
On a C scroll both ends are rolled the same way to form a letter C type shape. Is quite usual for both ends to scrolled the same amount. C scrolls tend to be smaller or rolled less than an S scroll. It makes them ideal for small gap filling. Although there is no reason why a C scroll needs to be small, and of course they don’t have to be equally rolled at both ends.

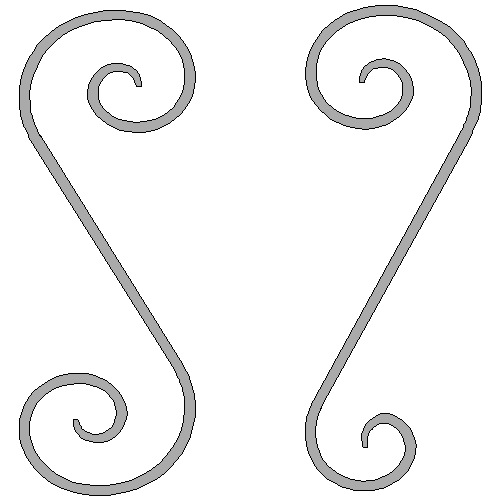
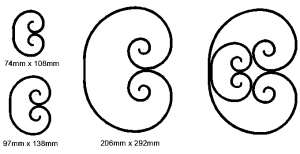
On the left, S scroll and C scroll, both equal and unequal ends
On the right, two S scroll of a sort that look the same at first glance. One is made from two S scrolls placed together. The other is from two C scrolls. If you were quickly scrolling down the page you will have quite likely missed the difference. Subtle but different, its a good example of how arranging scrolls can make a difference to any design.
Scrolls are incredibly adaptable, using multiple scrolls can make some very interesting patterns.
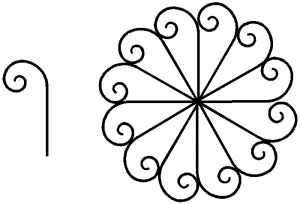
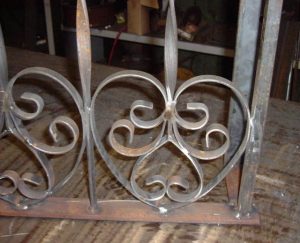
Here a single scrolled end, left side of image. Can be made into a fan or ring shaped pattern. An effective centre piece for any gate. railing or Juliet balcony. Of course its time consuming as in something like this there are 12 ends.
The scroll on the far right, is the component scroll used to create the other 3 scrolls. Simple line them up and weld together at the connecting point. As you can see from the picture, if you change the connecting point you change the size. This can be a major issue. If the left most scroll was your initial choice but you change you mind and decide the 2nd from the left is better. The component scroll now needs to be larger to make the same size as the first scroll.
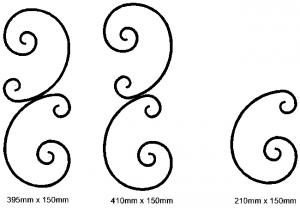
All C scrolls of different sizes on the left. As they get bigger so does the gap. On the largest one in the picture you can run into issues, if you are using this in some that needs to be to building regulations. The gap in the scroll is larger than 100mm. The solution is the C scroll on the right. A large one with a smaller one nested inside.
Using C scrolls here, to kind of create an S scroll, of a fashion. The right most scroll is a C scroll, one end scrolled a small amount the other scrolled a lot further. Creating an uneven C scroll.
Connecting the two together until they for a kind of S scroll and welding together. Like the examples in the S scrolls, changing the position where they touch changes the shape and size.
Making a scroll.
In order to make a scroll you simply need a scroll former tool. This is usual heavy weight scroll. And of course a suitable piece of steel to form the scroll with. The steel strip is pulled around the former until you have the desired scroll end. Pulling it further around the former increases the size of the scroll, whilst the overall length of your steel strip gets shorter. The more you roll it around the former the more length is required. Once you have one end formed, then roll the other end. Either in same direction for a C scroll or the opposite direct for an S scroll.
. The art is cutting the steel to the perfect length to get the desired scroll size. More often or not this never happens and you end up making a couple of test pieces to get it perfect. A pain if you are making lots of one off sizes as the scrap pile can sometimes end up larger than the usable pile. But not really an issue to make 2 or 3 test pieces when making a batch 50 scrolls all exactly the same size.
What is a scroll
I have often had customers refer to them as spirals, which is kind of true. Wikipedia has a good explanation what a spiral is.
Scrolls used in metal work usually have a mathematical formula to them. The most well know is perhaps the Fibonacci sequence (Wikipedia). This produces a scroll that accelerates quite rapidly as it gets bigger. The vast majority of ironworkers use there own version of a scroll. Which might explain why when you look at vast number of designs on the internet with scrolls as part of the design, there are noticeable difference between them. This can sometimes make it difficult when asked to replicate an existing gate for someone that was made by someone else. This usually means making a new scroll tool based on the original shape of the existing scrolls.
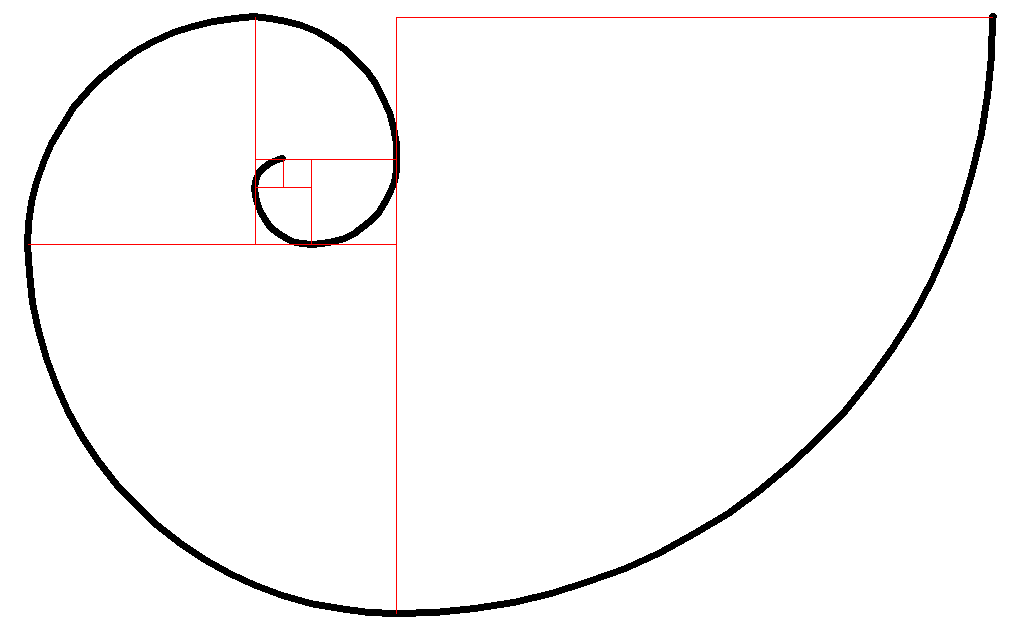
A classic Fibonacci scroll where the radius of the next quadrant of the scroll is equal to the sum of the previous 2 quadrants. 1 , 2 , 3 , 5 , 8 , 13, 21 etc.
For the purpose of the scroll drawing its 340mm x 210mm
The quadrants on the Fibonacci scroll are very neatly arranged. But for its physical size as drawn there is a lot of open space.
For the purpose of the drawing, the radius of the first quadrant is 8mm, then work out 13mm, 21mm, 34mm, 55mm, 89mm, 144mm,
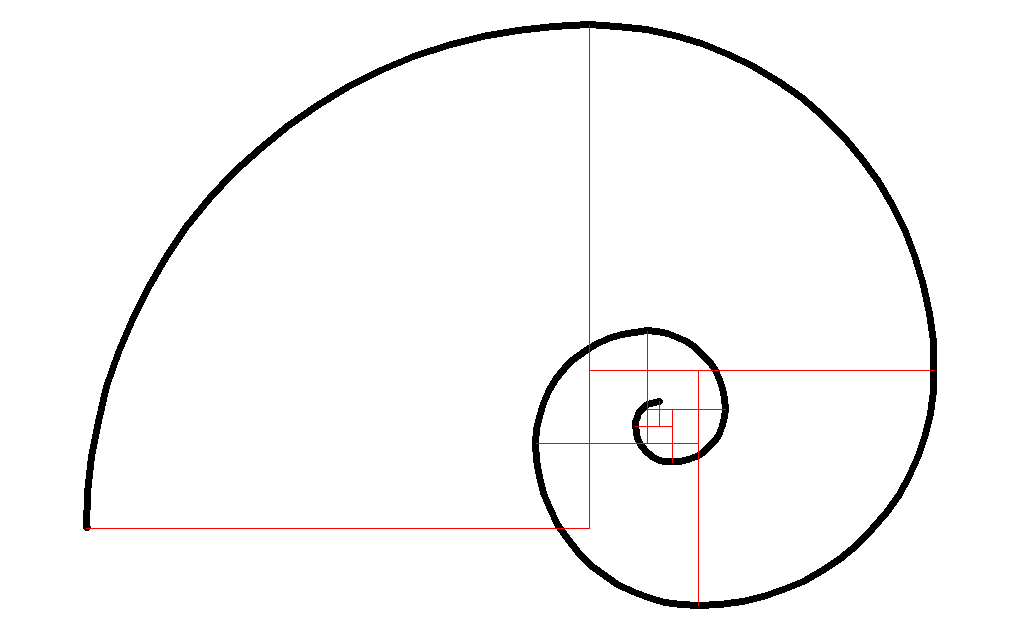
This what we use as the basis for a scroll different from the Fibonacci scroll. It still has a mathematical formula to it. Each quadrant is 1.45 times bigger than the previous one. In my opinion it produces a nicer tighter scroll.
Noticeable here the quadrants are not as neat as the previous scroll, but the quadrants are just for the purpose of drawing the scroll.
If you follow the numbers on the Fibonacci sequence its actually around 1.61 times bigger on each quadrant compared to the previous one.
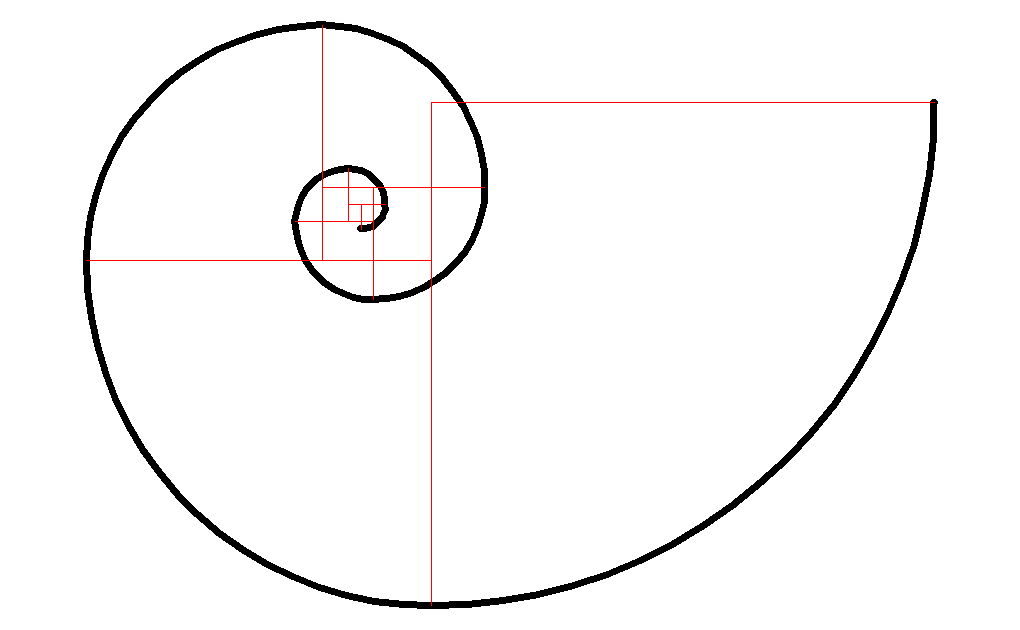
With both scrolls set so they finish the same way, you can see the centre is tighter on the right. Because of this, it is our preferred scroll form. Both scrolls are the same size in terms of height. Although the width on the right hand scroll is smaller, because it is tighter.
Of course you can make a scroll to follow any pattern required, but there is usually a lot of time spent making the scroll former. Easy to spend 1/2 a day making a good former. So is not always economical to do so. if its just for a few scrolls